as
Development Environment Setup Guide
Build System Overview
The project (referred to as AS below) uses Python-based SCons as its build system. Python scripts orchestrate the compilation of a large number of modules with high flexibility and controllability. This guide explains how to set up the simulation development environment on Windows from scratch; no hardware board is required.
1. Install Required Software
Download and install the following three packages first. The default install paths are recommended:
| Package | Download Link | Default Install Path |
|---|---|---|
| MSYS2 | msys2.org | C:/msys64 |
| Anaconda3 | anaconda.com | C:/Anaconda3 |
| 7-Zip | sparanoid.com/lab/7z | C:/Program Files/7-Zip/7z.exe |
- MSYS2: provides the pacman package manager used to install the gcc/g++ toolchain, qemu and other tools;
- Anaconda3: provides the Python environment and pip for installing scons and other Python dependencies (it already ships with many common libraries such as pyQt);
- 7-Zip: required to unpack the development console (ConEmu), which is distributed as a 7z archive.
2. Launch the Development Console
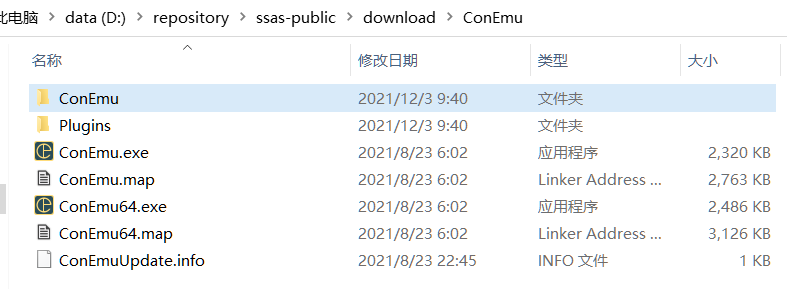
Double-click Console.bat in the repository root. On the first run, the script automatically downloads and installs ConEmu, a handy Windows terminal, into ssas/download/ConEmu.
If automatic download fails because GitHub is unreachable on your network, download ConEmu Portable manually, unpack it into the directory above, and run Console.bat again:
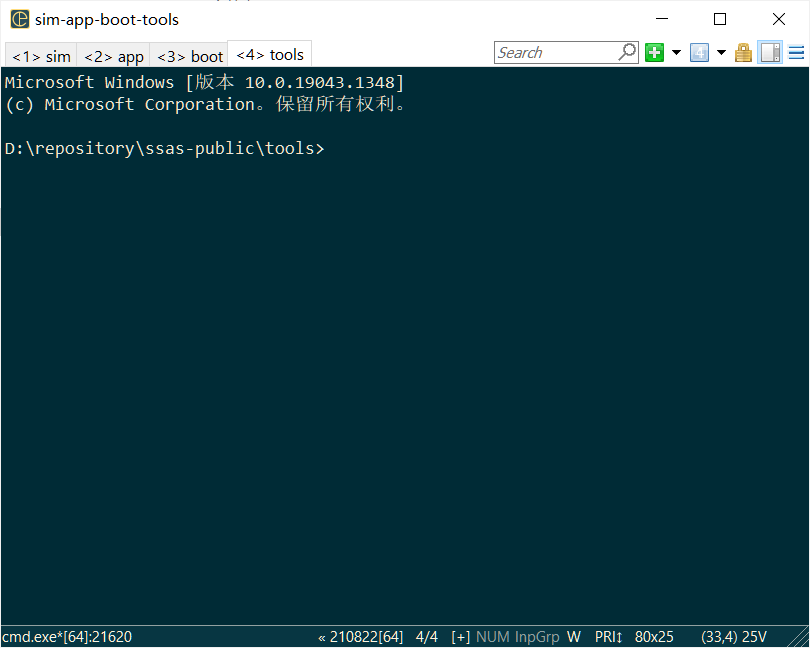
Once started, ConEmu opens four console tabs - sim, app, boot and tools - used to build and run the simulator node, applications, the bootloader and PC tools respectively:
Tip: to keep ConEmu and third-party packages downloaded during the build outside the repository, set the
AS_DOWNLOAD_DIRenvironment variable to a custom directory.
3. Install the Dependencies
Run the following commands line by line in any ConEmu tab to install the toolchain with pacman:
pacman -Syu
pacman -S --needed base-devel mingw-w64-ucrt-x86_64-toolchain
pacman -S unzip wget git make cmake patch automake-wrapper libtool
pacman -S mingw-w64-x86_64-gcc mingw32/mingw-w64-i686-gcc mingw-w64-x86_64-binutils
pacman -S mingw-w64-x86_64-diffutils mingw-w64-x86_64-pkg-config mingw-w64-x86_64-dlfcn
pacman -S mingw-w64-x86_64-glib2 mingw-w64-x86_64-gtk3 mingw-w64-x86_64-protobuf
pacman -S ncurses-devel gperf curl unrar msys2-runtime-devel mingw-w64-x86_64-qemu
Then activate the Anaconda environment and install the Python dependencies (it is recommended to activate it once per tab before running scons):
c:\anaconda3\Scripts\activate
pip install scons==4.5.2 pyserial pybind11 pillow ply pyqt5 bitarray
Note: for some Anaconda installations, change
ENABLE_USER_SITEinC:\Anaconda3\Lib\site.pyfromNonetoFalse, and make sure the current user has full access rights toC:\Anaconda3.
The command list above may not cover every dependency (the author’s own environment was set up long before this document was written). If the build reports a missing header file or command, simply install the missing package with pacman/pip according to the error message.
4. Verify the Build
Switch to the app tab and build the two sample applications:
# app tab
D:\repository\as>scons --app=IsoTpSend
scons: Reading SConscript files ...
scons: done reading SConscript files.
scons: Building targets ...
scons: building associated VariantDir targets: build\nt\GCC\IsoTpSend
CC app\platform\simulator\src\Can.c
......
CC tools\libraries\isotp\utils\isotp_send.c
LINK build\nt\GCC\IsoTpSend\IsoTpSend.exe
scons: done building targets.

D:\repository\as>scons --app=CanApp
scons: Reading SConscript files ...
scons: done reading SConscript files.
scons: Building targets ...
scons: building associated VariantDir targets: build\nt\GCC\CanApp
CC app\app\config\CanNm_Cfg.c
......
CC app\platform\simulator\src\simulator.c
LINK build\nt\GCC\CanApp\CanApp.exe
scons: done building targets.
5. Run the Diagnostic Simulation Test
In the app tab, run CanApp, which acts as a simulated CAN node:
# app tab
D:\repository\as>build\nt\GCC\CanApp\CanApp.exe
INFO    :application build @ Dec  3 2021 21:57:05
......
DCM     :physical service 10, len=2
INFO    :App_GetSessionChangePermission(1 --> 1)
INFO    :DCM s3server timeout!
Then switch to the boot tab and run IsoTpSend to emulate a diagnostic tester, sending a UDS session-control request (10 01) to CanApp:
# boot tab
D:\repository\as>build\nt\GCC\IsoTpSend\IsoTpSend.exe -v 1001
TX: 10 01
RX: 50 01 13 88 00 32
You have now completed a simple diagnostic session simulation entirely without hardware: CanApp plays the role of the CAN node, while IsoTpSend plays the role of the diagnostic tester. The simulation principle will be explained in follow-up articles.
The development environment is ready. Enjoy!
Appendix: GDB Debugging
The default C:/msys64/usr/bin/gdb may have issues debugging MinGW programs. Use the UCRT64 version C:/msys64/ucrt64/bin/gdb.exe instead; this toolchain is installed in section 3 with:
pacman -S --needed base-devel mingw-w64-ucrt-x86_64-toolchain